
You’ve cooked a to-die-for dinner and now you’d like to snap it into posterity. Or arranged a picnic platter so artfully that it feels wrong to dip into that burrata and prosciutto without preserving the moment. Here are Iona’s top five tips for getting your angles – and everything else – exactly right!
1 Lighting, lighting, lighting!
This can get overly technical, but it really doesn’t have to. Generally, it’s best to light food from the side – so bring it close to a big window that’s casting some good natural light.
Light drinks from behind if you can – that way they appear illuminated and translucent.
If you don’t have any natural light in your kitchen and you’re keen in your photographic quest, then switch off your yellow tungsten indoor lights (they cast a horrible yellow tone!) and invest in a daylight ambient LED panel instead.
2 Props
No food photo is complete without a beautiful prop or two, even if it’s just a lovely single stoneware bowl. I find it great fun to source new props from different antiques shops, or homeware stores, and especially if I go overseas on holiday.
If you’re serious about your food photography, invest in a vinyl backdrop or two so you can create a variety of faux kitchen counters. And an array of muted coloured linens never goes amiss for acting as tablecloths and napkins.
3 All the gear and no idea?
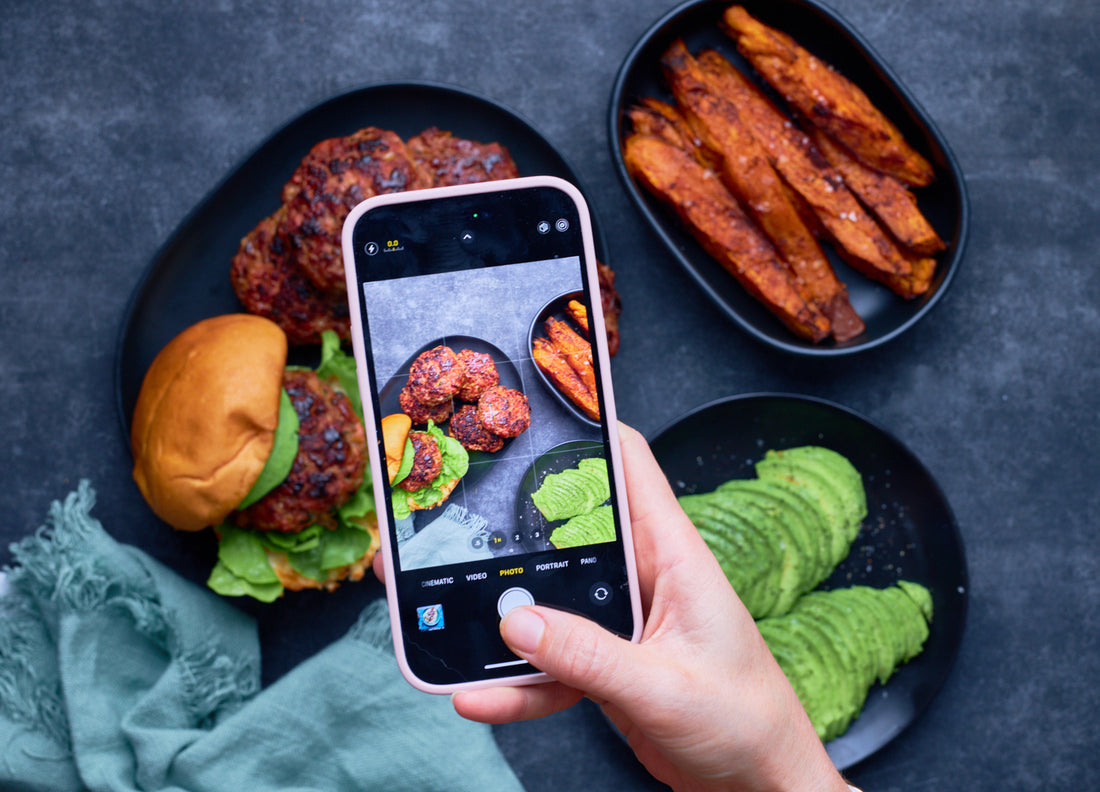
Before you go out and buy any fancy equipment, let me point out that you don’t need anything expensive to get started. There’s a lot of choice out there, but it’s how you use it that counts. Most people are shooting on their iPhones these days anyway.
My main advice would be to get to know the equipment you have (even if it’s just a phone), find out its features, learn what it’s like to over- and under-expose a photo, and nail down focusing. Instantly you’re on your way to being an amazing photographer!
4 Apps
There’s a lot of choice out there, so have fun with it all! I suggest Lightroom/Photoshop/Capture One for desktop… there’s much excitement to be had with editing! There’s plenty of content on YouTube about editing skills – either to learn the basics or to upskill. Maybe invest in some photography presets from a creator to get you started. Adobe Lightroom and Photoshop also offer iPhone apps – and you can sync your subscription. For editing videos on iPhone, Capcut is great. And I use Premiere Pro for laptop.
5 Experiment
Like any other type of artist, just experiment and find your own style. I would suggest trying to work with all sorts of different angles – overhead, 45 degrees and composition. And learn about the rule of thirds and negative space – they are great easy tools for any photographer.
The best way to improve, always, is to lean into your creativity, be brave and find out what works for you. You can’t get better without consistent effort and … it’s food! There’s no such thing as bad art in food photography – just a delicious dinner that needs eating! What’s the worst that can happen?!
Snap up some delicious food to photograph today!